How to Clean Found Coins Without Destroying Their Value
Coin cleaning has gotten complicated with all the bad advice flying around. Put down the vinegar. Seriously — step away from it. As someone who’s been digging coins for over fifteen years, I learned everything there is to know about what happens when impatient hobbyists follow random forum tips. It isn’t pretty. More than broken pinpointers, more than walking away empty-handed after a full day out — nothing stings quite like watching someone scrub a potentially valuable coin into a worthless slug. That’s exactly why this guide exists.
The numismatic community has clear, established standards around coin cleaning. Not suggestions. Not talking points open to interpretation depending on which Facebook group you’re in. And yet, every metal detecting community seems to harbor that one confident guy telling beginners to fire up the tumbler or grab a Magic Eraser. This is the antidote to that guy.
The Golden Rule — Do Not Clean Valuable Coins
Probably should have opened with this section, honestly. Before distilled water soaks, before soft brushes, before olive oil — you need one thing burned into your memory: cleaning a coin almost always destroys its numismatic value. Not reduces. Destroys.
But what is numismatic value? In essence, it’s what collectors will actually pay for a coin based on condition and rarity. But it’s much more than that. When a coin leaves the mint, its surface carries microscopic structure — die flow lines, the luster of fresh metal pressed under enormous pressure. Over decades underground, coins develop patina — a natural chemical layer that effectively tells their story. Graders at PCGS and NGC, the two dominant third-party grading services, are trained to read those surfaces. Under magnification, they can spot cleaning even when the naked eye sees nothing unusual.
A coin graded “cleaned” receives what’s called a “details” designation. A circulated Morgan silver dollar that would have graded VF-30 — selling somewhere between $80 and $120 — comes back as “VF Details — Cleaned” and moves for $25 on a good day. That’s not a minor haircut. That’s the difference between a coin worth submitting and one that spends eternity in a junk box.
What Cleaning Actually Does to the Surface
Even gentle cleaning removes metal. Even a soft cloth. That cartwheel luster on an uncirculated coin — the effect you catch when you tilt it slowly under a light — exists because die flow lines are sitting perfectly undisturbed. One pass with cotton fabric leaves hairline scratches across that surface. Under 10x magnification, it resembles sandpaper damage.
Chemical cleaning is worse. Vinegar dissolves copper oxides — sure, technically — but it also etches the underlying metal and leaves a porous, artificially bright surface. Graders call this “whizzed” or “polished” depending on execution. Either way, it’s a death sentence for the grade.
Don’t make my mistake. I once pulled a 1916 Barber dime from an old homestead site in central Virginia — ran it through a quick lemon juice rinse I’d read about somewhere online, thinking it was a common date. Turned out it was a 1916-S. Not the legendary 1916-D, but still worth $40–$60 in the condition I’d found it in. After my little cleaning adventure, a dealer offered me $12. Lesson learned the hard way, and it stuck.
How to Tell If a Coin Might Be Valuable
You don’t need expertise here — you need a reference. The Red Book — officially A Guide Book of United States Coins by R.S. Yeoman, currently in its 77th edition, available for about $16 on Amazon — lists mintages and approximate values for every U.S. coin series. Low mintage numbers translate to higher potential value. Key dates worth knowing: the 1909-S VDB Lincoln cent, the 1916-D Mercury dime, the 1921 Peace dollar, and the 1932-D and 1932-S Washington quarters, among others.
Anything over fifty years old — your default position is don’t touch it. Drop it in a 2×2 cardboard flip, write the find location and date on the outside in pencil, set it aside for research. That’s the whole move. Simple as that.
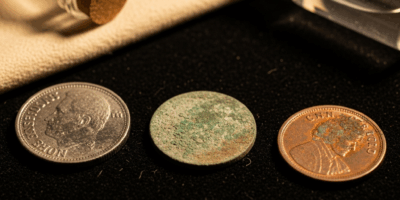
When Cleaning Is Fine — Modern Clad and Common Finds
Not every coin warrants white-glove treatment. Most don’t, honestly. The reality of metal detecting is that the overwhelming majority of ground finds are modern clad — post-1965 quarters, dimes, and halves in copper-nickel, plus memorial cents and Jefferson nickels. These carry essentially zero numismatic premium above face value. A 1978 Roosevelt dime is worth ten cents. A 2003 State quarter is worth twenty-five cents. Cleaning these to read a date or put them on display? Completely fine.
Pre-1965 silver coins require more thought. A common-date Mercury dime in worn condition might fetch $3–$5 in silver melt value regardless of cleaning — lower stakes than a key date — but get in the habit of researching before touching anything silver. Surprises turn up.
Tokens, buttons, and foreign coins occupy their own category. Civil War era tokens, colonial coppers, early American buttons — these can carry serious value depending on age and rarity. The same “don’t clean” principle applies to anything potentially collectible. Consult a reference or a dealer first.
Safe Methods for Everyday Finds
For coins where cleaning is genuinely appropriate — common modern clad, heavily worn low-value pieces, finds you want to display without collector-grade concerns — there are right approaches and catastrophically wrong ones. The gap between them is wider than most beginners expect.
Distilled Water Soak
Start here. Always start here. Distilled water — not tap water, which carries minerals and chlorine that react with metal — loosens dirt gently over time. Fill a small glass container — a repurposed jelly jar works perfectly — with distilled water. A gallon runs about $1.29 at any grocery store. Submerge your coins and let them sit 24 to 48 hours, changing the water once or twice. The amount of loose soil that comes off with zero mechanical action will probably surprise you.
After soaking, rinse under a slow stream of distilled water and let air dry on a soft, lint-free cloth. Don’t rub. Pat gently if absolutely necessary — or just let them sit and dry on their own.
Olive Oil for Stubborn Encrustation
Frustrated by coins that emerge from iron-rich soil looking like small rocks, plenty of detectorists eventually discover olive oil as a slow, patient solution. Pure olive oil — not extra virgin, which carries more acidity, but pure or light olive oil — softens and loosens hardened dirt and mineral encrustations over weeks or months without chemically attacking the underlying metal the way acids do.
Submerge the coin completely in a small container of oil. Check it weekly. Use a wooden toothpick — not metal, never metal — to gently lift away loosened material. Some coins take two weeks. Some take three months. That’s what makes olive oil endearing to us detectorists — the patience it demands is exactly what keeps coins intact. Rush this process and you’ll find yourself reaching for something harsher, which is where the damage starts.
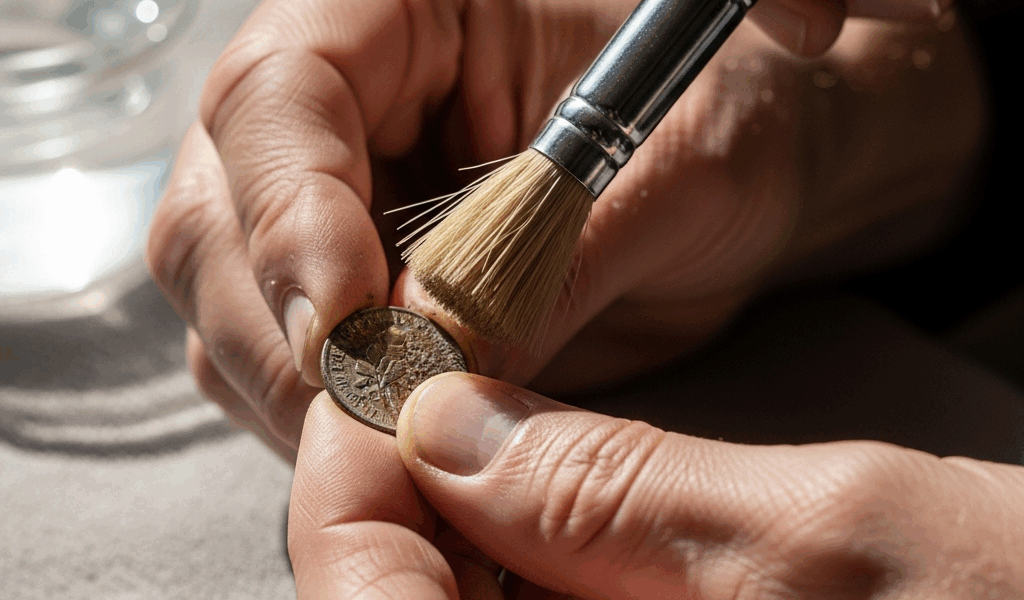
Gentle Brushing
If brushing is necessary — and after a proper soak, often it isn’t — use a soft natural-bristle brush. A child’s watercolor paintbrush in the 3/4-inch size works well, as does a dedicated coin brush from Lighthouse, a German accessories brand widely available through coin supply shops. Brush under running distilled water with zero downward pressure. Straight, light strokes only. No scrubbing, no circular motions — let the bristles do whatever work needs doing.
What Never to Use
This list matters more than everything above it.
- Vinegar — Etches metal. Leaves an artificial, porous surface. Destroys patina entirely.
- Baking soda paste — Abrasive at the microscopic level. Scratches surfaces you can’t see until it’s too late.
- Ketchup or lemon juice — Same problem as vinegar. Acidic. Etches.
- Metal polish (Brasso, Nevr-Dull, etc.) — Engineered to strip oxidation from hardware. It does exactly that to coins — removing every trace of natural surface character.
- Coin tumblers or rock tumblers — Common beginner mistake. Abrasive action destroys surface detail and luster on anything worth keeping.
- Ultrasonic cleaners — Fine for jewelry. Problematic for coins because the cavitation process can pit soft metal surfaces.
- Paper towels or rough cloths — More abrasive under magnification than they appear in your hand.
- Toothpaste — Another internet classic that’s genuinely terrible. Mild abrasive by design. Treat it like sandpaper.
The pattern is consistent: anything that works fast is probably working by removing metal or wrecking surface chemistry. Slow and gentle isn’t a stylistic preference — it’s the only approach that leaves anything worth having.
How to Store Coins After Finding Them
Finding the coin is half the job. Storage determines whether it stays preserved or quietly degrades in your collection over the next several years.
Individual Flips, Not Jars
The worst storage method — and apparently the most common one in beginner setups — is dropping everything into a glass jar together. Coins rattle. They scratch each other. They transfer surface chemistry. A jar is perfectly fine for nails and bottle caps. It is not a coin storage solution.
Use individual 2×2 cardboard coin flips — sold in packs of 100 for around $4–$6 at any coin supply retailer, including Wizard Coin Supply, Littleton Coin Company, or Amazon. Each coin gets its own flip, labeled in pencil — not pen, since ink can bleed and chemically interact with coin surfaces over time — with the find date, find location, and any identifying notes.
For higher-value finds — anything silver, anything pre-20th century, anything potentially gradeable — Mylar flips are the better option, as coin storage requires chemical inertness over the long term. That is because PVC flips, the soft flexible ones, off-gas over time and leave a green oily residue called PVC damage on coin surfaces. Mylar flips are stiffer, chemically stable, and worth the slight price difference.
Handling by Edges
Handle every coin by its edges. Every single time — make it a reflex. Skin oils transfer to coin surfaces and cause long-term spotting and chemical reactions, particularly on silver and copper. Pick up by the rim, put down by the rim. If you’re examining something closely, hold it over a soft surface in case it slips, and keep fingers off the obverse and reverse entirely.
Environment — Cool, Dry, Stable
Coins don’t like humidity. They don’t like temperature swings — garages, attics pushing 120 degrees in July, basements with moisture issues, storage near heating vents. A consistently cool and dry interior room is ideal. For larger collections, a dedicated coin cabinet or storage box with silica gel packets — the rechargeable Dry-Packs 40-gram silica canisters work well — keeps humidity in check without getting complicated.
Direct sunlight fades album pages and causes uneven toning on exposed coins. Keep storage away from windows. Simple enough.
Documenting Your Finds
One last thing — not strictly storage, but it belongs here. Document where every significant coin came from. The provenance of a find, its location and context, adds historical interest and sometimes measurable value. A colonial copper pulled from a documented 18th-century site is a different object than an identical coin with unknown origins. A small notebook, or a basic spreadsheet with GPS coordinates, descriptive location notes, find depth, and associated finds, takes five minutes per coin. That habit pays off.
Metal detecting hands you a direct line to history. The coins coming out of the ground have been sitting there for decades or centuries — they arrive carrying everything they’ve witnessed. The least we can do is handle them carefully enough that they survive our attention.


Stay in the loop
Get the latest collectors coin corner updates delivered to your inbox.