The Golden Rule — Don’t Clean Valuable Coins
Metal detecting has gotten complicated with all the cleaning advice flying around online. As someone who has spent eight years dragging a detector through parks, fields, and old homesites, I learned everything there is to know about ruining coins with my own two hands before I finally understood the rule that actually matters: if you think it might be valuable, don’t touch it.
Not with water. Not with a cloth. Not with anything. Just don’t.
The first coin I seriously damaged was a 1943 wheat penny. Found it at a park in Connecticut — orange clay caked so thick I could barely make out the date. I was genuinely proud of that find. Proud enough to scrub it under my kitchen sink with an old toothbrush within five minutes of digging it up. Tap water, a little elbow grease, maybe 60% of that encrustation gone. Done in three minutes flat.
Three years later I found out that 1943 pennies struck on steel blanks are legitimately valuable. We’re talking $50 to $150 depending on condition and mint mark. Mine went to a dealer and came back valued at around $1.50. The patina I’d scrubbed away — that dark, ugly stuff I thought was just dirt — was exactly what made the coin worth something. And what I’d done was permanent. There’s no putting patina back.
Don’t make my mistake. Encrusted dirt is fixable. Removed patina is not. That penny taught me more than three years of forum reading ever did.
Why Professional Grading Matters
But what is numismatic value, exactly? In essence, it’s the worth a coin carries based on its rarity, condition, and originality. But it’s much more than that — it’s also about what hasn’t been done to the coin. Every time human hands interfere, value tends to disappear.
When you pull something from the ground with an older date, an unfamiliar mint mark, or any detail that makes you pause — your job is simple. Get it in front of someone who knows what they’re looking at. Not to clean it yourself. Not even a little.
Grading services like PCGS and NGC have spent decades studying exactly how cleaning affects coins. They will find evidence of even gentle cleaning on coins over a century old. And they will dock the grade — sometimes hard. That’s what makes the original surface so endearing to us detectorists who’ve learned this lesson the painful way.
Frustrated by a filthy 1901 Morgan dollar I’d pulled from a field in Massachusetts, I nearly soaked it in water the same night I found it. Instead — somehow — I remembered the wheat penny. I shipped it as-is in a padded envelope to a grading service, encrustation and all.
It came back slabbed at MS-62. Estimated value: $280. The grader told me afterward that a light cleaning — even a careful one — would have dropped it to AU-50, roughly $140. The difference was original mint luster. Untouched. Still there because I kept my hands off it.
So here’s how it works practically: take it to a local dealer or ship it to a professional grading service. Assessment runs $20 to $50 depending on the service. Pay it. You won’t spend the next three years wondering if you destroyed something genuinely rare, and honestly, that peace of mind is worth every cent of it.
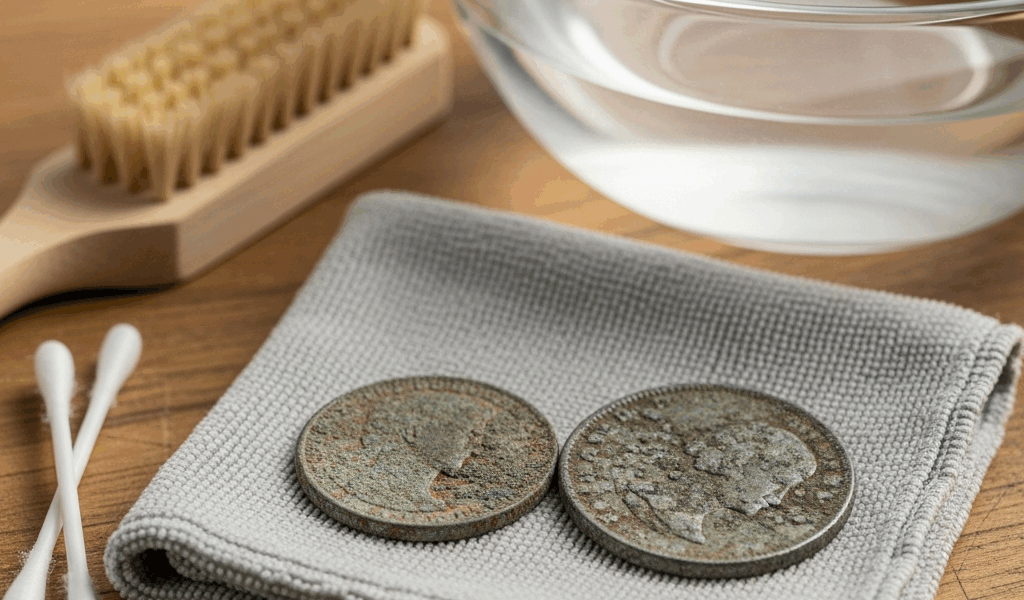
Safe Methods for Common Finds — Distilled Water and Patience
Probably should have opened with this section, honestly. Because most of what you dig up isn’t treasure. Most of it is modern clad coinage, heavily corroded post-1950s pennies, and common circulated coins with zero numismatic interest. That’s the reality of detecting — and that’s where gentle cleaning actually has a place.
The safest method is also the simplest. Distilled water and time. That’s it.
The Distilled Water Method
Here’s the process I’ve landed on after years of trial and error — and a few more ruined coins along the way:
- Buy distilled water. Not tap water. Distilled. A gallon runs about $1.50 at any grocery store. The minerals in tap water leave deposits and cause oxidation problems that you will absolutely notice later.
- Place your coin in a small glass or ceramic bowl. Not plastic — some residues can leach from plastic into the water over time, and there’s no reason to risk it.
- Pour distilled water over the coin until it’s submerged, with about half an inch of water above the surface.
- Leave it alone for at least 24 hours. Heavily encrusted finds get 3 to 5 days from me. Patience does more work than friction here — always.
- After soaking, use a soft toothbrush — the kind designed for your mouth, not a garage cleaning brush — and very lightly brush away whatever has loosened. Think “dust off,” not “scrub.”
- Rinse under distilled water and pat dry with a soft lint-free cloth.
This handles about 80% of my common finds. Simple, repeatable, and genuinely safe.
The soft-toothbrush part I learned the hard way — again. Found a 1920s Buffalo nickel, grabbed a medium-bristled brush from under the sink, and told myself I was being careful. The design was already partially worn. That brush accelerated the wear across every high point on the coin. Irreversible damage in under two minutes. Don’t make my mistake.
What Not to Use — The Dangerous Methods
I’ve either tested these myself or watched other detectorists use them in the field. Every single one caused damage I wouldn’t wish on a wheat penny:
- Vinegar — Acidic and fast-acting. Eats patina and creates pitting on the surface. I soaked a wheat penny in white vinegar for two hours once. The visible damage looked like fresh corrosion. Worse than when I started.
- Baking soda paste — Feels gentle. Isn’t. Creates micro-scratches across the surface that catch light in ways that immediately signal cleaning to any experienced grader.
- Metal polish — Brasso, Twinkle, anything like that — These strip tarnish and expose shine. On coins, they destroy the original finish completely. Numismatic value goes to zero. I’ve watched it happen. It’s genuinely painful to see.
- Wire brushes — Obviously damaging, but apparently worth mentioning because people still try it.
- Boiling water — Can cause stress fractures in older coins, especially those with voids or weak spots in the metal.
- Bleach or hydrogen peroxide — Oxidizes metal in unpredictable ways. Spotting, corrosion, discoloration. Not worth experimenting with.
The rule I use for safe cleaning is simple: if you wouldn’t use it on your skin or in your mouth, keep it away from your coins. Distilled water passes that test. Everything else on this list doesn’t.
When Electrolysis Makes Sense — For Heavily Encrusted Finds
Some coins come out of the ground so completely buried under mineral deposits and rust that you can’t read the date or make out any details at all. Distilled water alone won’t touch these in any reasonable timeframe — I’ve let some soak for two weeks and seen almost no improvement.
Frustrated by one particularly stubborn coin that had been soaking for a week with barely any progress, I built a simple electrolysis setup using things I already had around the house. That was probably the best decision I’ve made in eight years of detecting.
But what is electrolysis? In essence, it’s a chemical process that uses electrical current to dissolve corrosion without anything physically touching the coin’s surface. But it’s much more than that — it’s actually kind of fascinating to watch in real time, bubbles forming, encrustation visibly breaking down.
Basic 12V Electrolysis Setup
While you won’t need a dedicated lab setup, you will need a handful of specific materials. Here’s exactly what I use:
- A 12V power supply. I pulled an old laptop charger rated 12V, 2A from a drawer — cost me nothing. A dedicated 12V battery charger from Harbor Freight runs about $30 if you need one.
- Two stainless steel electrodes. I use 1/4-inch stainless steel rods from Home Depot — around $8 for a small bundle.
- Washing soda — sodium carbonate, not baking soda. It’s in the laundry aisle. About $3 a box.
- Distilled water. Same gallon from before.
- A plastic food storage container. Any size that fits your coin comfortably.
- Alligator clip jumper cables to connect the power supply to the electrodes. A set runs about $5.
The process itself:
- Mix one tablespoon of washing soda into a gallon of distilled water. Stir until fully dissolved.
- Pour the solution into your plastic container.
- Attach one electrode to the positive terminal of your power supply and the other to the negative using the alligator clips.
- Place the coin on the negative electrode — the cathode. This part is important. Coin goes on the negative side.
- Position the positive electrode a few inches away from the coin, submerged in the solution but not touching the coin.
- Switch on the power supply. Bubbling will start around the electrodes almost immediately. That’s normal — it means it’s working.
- Check the coin every 30 minutes. Depending on encrustation, this can take two hours or several days.
- Once you can see details clearly, stop the process, remove the coin, and rinse thoroughly with distilled water.
The whole appeal of electrolysis might be the best option here, as heavily encrusted detecting finds require corrosion removal without abrasion. That is because nothing physical ever contacts the coin’s surface — the electrical current simply breaks the chemical bonds holding the encrustation in place.
I’ve run this setup on about a dozen coins now. An Indian Head cent that had been sitting in my “too dirty to bother with” pile for two years came back nearly perfect after three days. Date finally readable: 1907. Common coin — worth maybe 50 cents — but at least I finally knew what I had.
Safety Notes
First, you should use distilled water only — at least if you want predictable results. Tap water minerals cause reactions that are genuinely hard to control. A few other things worth keeping in mind:
- Keep voltage at 12V. Don’t experiment with higher — you risk damaging the coin or creating hazardous conditions.
- Don’t leave it running unattended for more than a few hours at a stretch. Check on it regularly.
- Never touch the electrodes or the solution while the power is on.
When you’re genuinely unsure whether a coin is worth cleaning at all, err toward caution. The rare finds — the ones that actually matter — will survive a conversation with a professional. The ones that aren’t worth professional assessment are almost always worth nothing more than a simple distilled water soak. Learn the difference early, and you won’t spend years of detecting regretting what your own hands did to something genuinely old.


Stay in the loop
Get the latest collectors coin corner updates delivered to your inbox.